![]()
|
|
|
|
|---|
My Mindstorms controlled dual track train crossing debuted at the Trains 2000 located in Burnaby, B.C. in November 2000. It was part of the first public appearance of the VLC (Vancouver Lego Club).
Click here to see an AVI of the Train Crossing in action!
 The base design is that of the 4532
Level Crossing set.
The base design is that of the 4532
Level Crossing set.
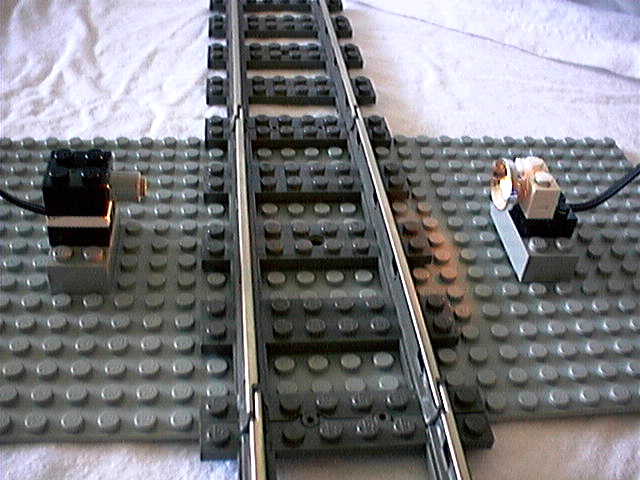
There are two custom light sensors set about four feet apart (with the crossing in the middle) with standard Lego 9 V light elements shining across the track. My original intention was to use infrared emitter's instead of the Lego light elements but I didn't have time to properly test it. The Lego elements provided a more visual demonstration anyway. The custom light sensors were created out of photo transistors (RadioShack part #276-145A) and Lego Electric Plating. This is a cheap alternative to using the bulky Mindstorms light sensors.

 The crossing barricades were modified to include micro
motors and appropriate gearing to give them the desired speed.
A Lego (red) belt was used for the appropriate drive mechanism
to allow slippage when the barriers had reached their destinations.
(You can see here it has slipped off while I was playing with
it to take the pictures.)
The crossing barricades were modified to include micro
motors and appropriate gearing to give them the desired speed.
A Lego (red) belt was used for the appropriate drive mechanism
to allow slippage when the barriers had reached their destinations.
(You can see here it has slipped off while I was playing with
it to take the pictures.)
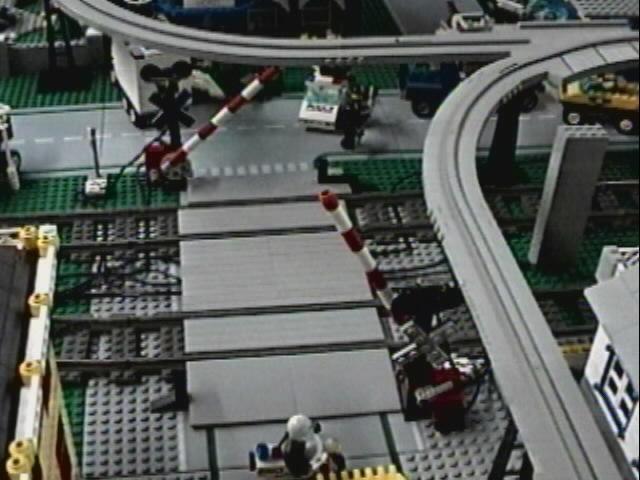
I added the crossing lights and X symbol to
complete the look. I originally used the Lego dual light element
with red lenses for the blinking lights but discovered I only
had one and shop at home had discontinued the service pack. I
could not get another one in black.  So
I created my own out of LEDs. In the end this turned out much
better. I used 3mm red LEDs (RadioShack part #276-1622) and discovered
that they were just the right size to fit into the design I created.
The black garbage can lid element (mini radar dish) allows the
LED to poke through and locks the LED in place. The LEDs are attached
to the wire in reverse from each other. This way, they blink alternatively
when the polarity is toggled. In order to bring the voltage down
to a safe level I used a 220 ohm resistor on a piece of cut electrical
plating.
So
I created my own out of LEDs. In the end this turned out much
better. I used 3mm red LEDs (RadioShack part #276-1622) and discovered
that they were just the right size to fit into the design I created.
The black garbage can lid element (mini radar dish) allows the
LED to poke through and locks the LED in place. The LEDs are attached
to the wire in reverse from each other. This way, they blink alternatively
when the polarity is toggled. In order to bring the voltage down
to a safe level I used a 220 ohm resistor on a piece of cut electrical
plating.
In the pictures the entire light assembly is pressure fit on top of the motor assembly. I found this worked but was fairly fragile. In future, I will use a special element found in the set 4541Road N' Rail Cherry Picker Truck (In the base of the sign post).
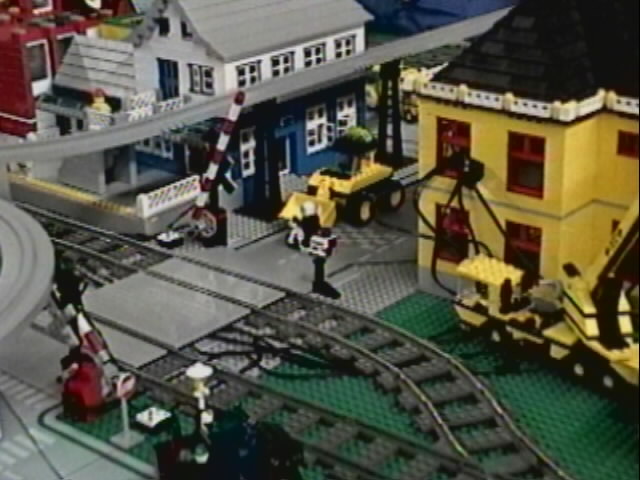 One aspect of the model that I did not take into account
was where to put all the wires. As you can see in the pictures,
we had to cover this up with the construction crew. This will
have to be addressed for the next showing.
One aspect of the model that I did not take into account
was where to put all the wires. As you can see in the pictures,
we had to cover this up with the construction crew. This will
have to be addressed for the next showing.
Another aspect I did not take into account is what happens if the train stops in between the two sensors. In the rare case when this happened on our layout the barriers would go up. To correct this, I plan to add a third light sensor very close to the crossing. They should take care of small trains but still allow the correct amount of time for the barriers to lower. My design also works with the train going both ways.
Also I would like to add a small bell to make the Ding Ding Ding sound.
The Lego Mindstorms program is relatively straightforward. You can see it or download a copy of it here. (You may have to hold down the SHIFT/CONTROL key) I used two sensor ports for the light sensors and two motor ports. One for the barrier control and the other one for the lights. For the above program the third motor port was used for controlling a switch track via IR.
Overall, this worked very well and looked great on our layout. We will be using it again on our next layout.
Click here to see some other miscellaneous images.
[RETURN] to TFM's Home Page